Table of Contents
Quick Summary Box
- The routine: 10 minutes daily, 6 movements, 60 to 90 seconds per area
- Core safety rule: Never roll directly over your lower back, joints, or acute injuries
- Top beginner gear: A High-Density Solid Foam Roller is the most versatile starting point for most beginners
A foam roller routine for beginners takes just 10 minutes a day and covers six key muscle groups — upper back, quads, hamstrings and glutes, calves, lats, and hip flexors — using slow, controlled pressure to release tight fascia and reduce muscle soreness. This isn’t a passive stretch. It’s an active recovery tool that directly addresses trigger points your muscles develop after training or long periods of sitting.
Muscle tightness and trigger points build up for two main reasons: exercise creates microscopic tension in your fascia — the connective tissue surrounding your muscles — and everyday sedentary habits like sitting for hours compound that tightness further. For anyone training at home without regular access to a massage therapist, self-myofascial release with a foam roller is genuinely one of the most practical recovery tools available.
The Science of Foam Rolling (SMR 101)
Fascia is the thin, connective tissue that wraps around every muscle in your body. When your muscles are worked hard or held in the same position for too long, that fascia can tighten and develop small, dense knots called trigger points — areas where the tissue has essentially locked into a sustained contraction.
Foam rolling applies sustained, direct pressure to these areas, encouraging the tissue to relax and release. According to Mayo Clinic Health System, foam rolling — more formally known as self-myofascial release — is an effective way to loosen up before a workout and reduce muscle soreness afterward.
The key benefits worth knowing:
- Increased circulation to the rolled area, delivering more oxygen and nutrients to tired muscle tissue
- Reduced DOMS (delayed onset muscle soreness), the achy tightness that typically peaks 24 to 48 hours after training
- Improved joint mobility, particularly through the thoracic spine, hips, and ankles — areas that tighten easily from both training and prolonged sitting
Choosing the Right Foam Roller for Beginners
Not every foam roller serves the same purpose. Density and texture change how the pressure feels and which areas it works best for.
| Roller Type | Firmness | Best For | Beginner Friendly? |
|---|---|---|---|
| High-Density Solid | Firm, smooth surface | General full-body use, large muscle groups | Yes — most versatile starting point |
| Textured Grid | Firm with raised nodules | Deeper, targeted trigger point release | Yes, once comfortable with basic pressure |
| Medium-Density Soft | Softer, more forgiving | Sensitive areas, true beginners, older adults | Yes — gentlest introduction |
For most people just starting out, a High-Density Solid Foam Roller offers the right balance of firmness and comfort to work through this entire routine effectively.
If you find yourself wanting more targeted pressure on specific trigger points once you’re comfortable with the basics, a Textured Trigger Point Grid Foam Roller mimics the feel of a deep tissue massage more closely.
If a standard firm roller feels too intense on your first few sessions, a Medium-Density Soft Foam Roller gives you a gentler entry point without sacrificing the core benefits.
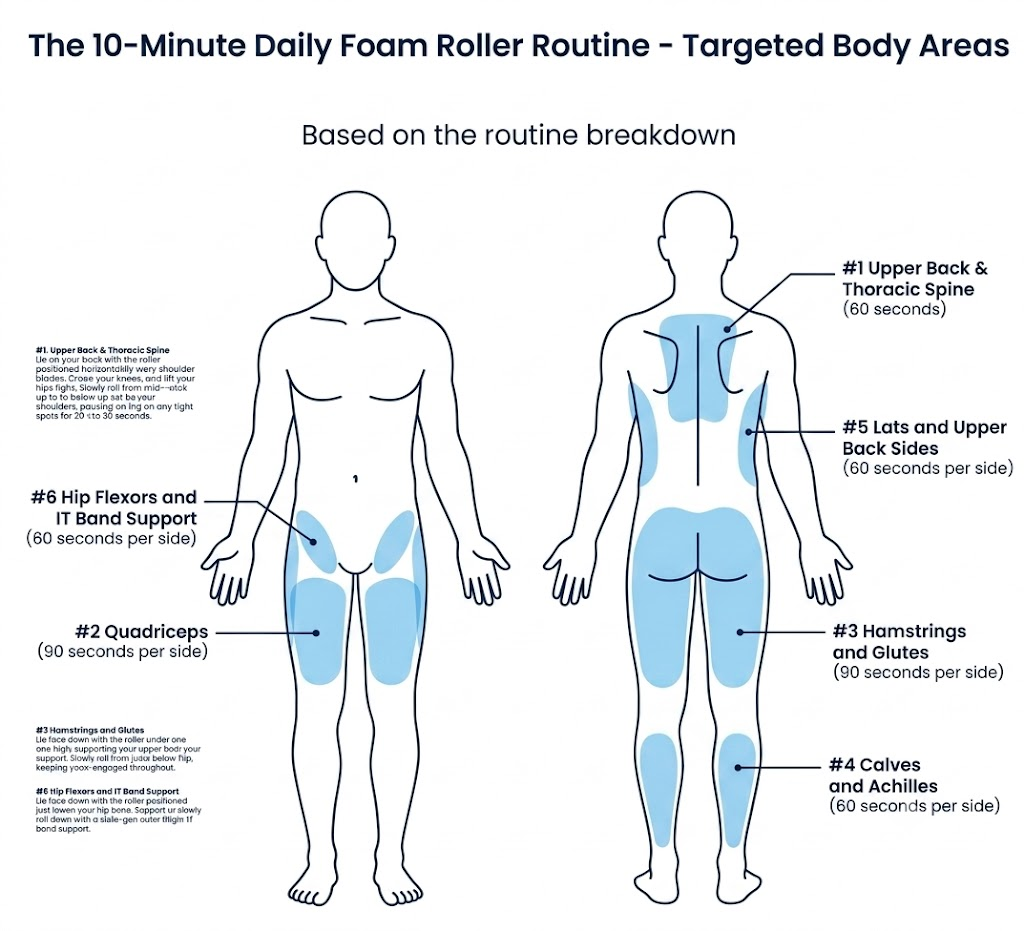
The 10-Minute Daily Foam Roller Routine
Here’s the full breakdown, minute by minute:
| Movement | Area | Duration |
|---|---|---|
| 1 | Upper Back and Thoracic Spine | 60 seconds |
| 2 | Quadriceps (each side) | 90 seconds per side |
| 3 | Hamstrings and Glutes (each side) | 90 seconds per side |
| 4 | Calves and Achilles (each side) | 60 seconds per side |
| 5 | Lats and Upper Back Sides (each side) | 60 seconds per side |
| 6 | Hip Flexors and IT Band Support (each side) | 60 seconds per side |
1. Upper Back and Thoracic Spine (60 seconds)
Lie on your back with the roller positioned horizontally beneath your shoulder blades. Cross your arms over your chest, bend your knees, and lift your hips slightly. Slowly roll from your mid-back up to just below your shoulders, pausing on any tight spots for 20 to 30 seconds.
2. Quadriceps (90 seconds per side)
Lie face down with the roller under one thigh, supporting your upper body on your forearms. Slowly roll from just above your knee to just below your hip, keeping your core engaged throughout.
3. Hamstrings and Glutes (90 seconds per side)
Sit on the floor with the roller under one thigh, hands planted behind you for support. Slowly roll from just above the knee to the base of the glutes, pausing on tender areas.
4. Calves and Achilles (60 seconds per side)
Sit with the roller under one calf, hands behind you supporting your weight. Slowly roll from just below the knee to just above the ankle, crossing your other leg over for added pressure if needed.
5. Lats and Upper Back Sides (60 seconds per side)
Lie on your side with one arm extended overhead and the roller positioned perpendicular to your body under your armpit. Slowly roll along the side of your torso, stopping wherever you find tension.
6. Hip Flexors and IT Band Support (60 seconds per side)
Lie face down with the roller positioned just below your hip bone on one side. Support your weight on your forearms and slowly roll down toward your knee, then follow up with a side-lying pass along your outer thigh for IT band support.
Golden Rules: Foam Rolling Dos and Don’ts
Do:
- Hold tender spots for 20 to 30 seconds rather than rolling straight through them
- Breathe deeply and steadily — holding your breath tenses the exact muscles you’re trying to release
- Move slowly. Fast rolling rarely produces real release and can feel more like friction than therapy
Don’t:
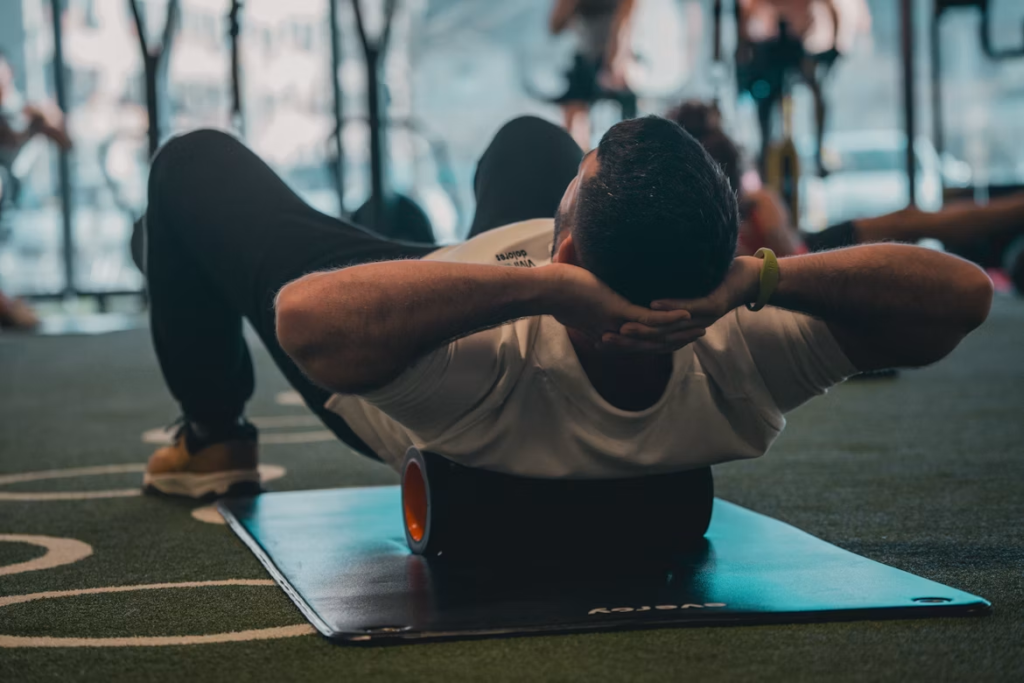
- Never roll directly over your lower back (lumbar spine). Your thoracic spine is supported by your rib cage, which makes it stable and safe to roll. Your lumbar spine has no such protection, and applying direct pressure there can cause the spine to hyperextend and place uneven, compressive force on the vertebrae themselves rather than releasing muscle tension. If your lower back feels tight, roll the muscles around it instead — glutes, hips, and the sides of your torso — rather than the spine directly. As explained by Healthline, rolling should stop at your mid-back, right around where your rib cage ends.
- Never roll directly over a joint — knees, elbows, or ankles — since there’s no meaningful muscle tissue there to release, only bone and connective tissue that can be aggravated by direct pressure
- Never roll over an acute injury, bruise, or area with active swelling — this can worsen inflammation rather than help it
Recovery Timing: When to Foam Roll
Pre-workout dynamic rolling — quick, lighter passes over major muscle groups for 30 to 60 seconds each — helps increase blood flow and mobility before you start training, without the deeper, slower pressure you’d use post-workout.
Post-workout deep release — this is where the full 10-minute routine above fits best, using slower, more sustained pressure to address the tightness and micro-tension your session just created.
Rest day active recovery — foam rolling pairs naturally with lighter movement on days off. For more on how to structure rest and recovery days generally, our guide on active recovery vs rest day routine covers exactly when gentle movement helps more than complete rest.
If you’re dealing with genuine muscle soreness rather than just general tightness, our guide on working out with sore muscles covers exactly how to tell the difference and what to do about it. And if your core specifically feels tight or fatigued from recent training, pairing this routine with our ab roller workout schedule ensures you’re both building and properly recovering that muscle group.
Frequently Asked Questions
Is foam rolling supposed to hurt?
It shouldn’t hurt in a sharp, alarming way, but genuine tender spots and trigger points often feel uncomfortable — a “hurts so good” sensation rather than acute pain. If something feels genuinely sharp or painful rather than tender, ease off the pressure or move to a different area.
Can I foam roll every single day?
Yes. Unlike heavy resistance training, foam rolling doesn’t create the same kind of muscle breakdown that requires extended recovery time, which is exactly why it works well as a daily 10-minute habit.
Should I foam roll before or after my workout?
Both serve a purpose. Lighter, faster rolling before training helps with mobility and blood flow. Slower, deeper rolling after training targets the tightness and soreness your session created. If you only have time for one, post-workout rolling generally offers the more meaningful recovery benefit.
Why shouldn’t you foam roll your lower back?
Your thoracic spine (mid to upper back) is stabilized by your rib cage, making it safe and effective to roll. Your lumbar spine (lower back) has no such structural support, so direct pressure there risks hyperextension and uneven compression on the vertebrae rather than genuine muscle release. Roll the muscles surrounding your lower back instead — glutes, hips, and torso sides.
Disclaimer & Affiliate Disclosure:
This article is for informational purposes only and should not be taken as medical advice. Always consult with a qualified healthcare provider or certified fitness professional before starting or changing your exercise routine. This article may also contain affiliate links. If you purchase through these links, we may earn a small commission at no extra cost to you.