Master the doorway pull-up progression for beginners with this proven 4-week plan. Build grip, back and shoulder strength to land your first strict pull-up.
Most beginners fail at pull-ups for one simple reason: they jump straight onto the bar and try to pull their entire body weight before they’ve built the strength to do it. This doorway pull-up progression for beginners takes a completely different approach — breaking the movement into manageable phases so you build real strength each week instead of grinding out zero reps in frustration.
Table of Contents
Why Most Beginners Fail at Pull-Ups
A pull-up demands something most exercises don’t: lifting 100% of your own body weight using your back, arms, shoulders, and core simultaneously. There’s no machine adjusting the resistance down for you and no way to fake your way through it.
Jumping straight onto a bar with none of that foundational strength usually leads to one of two outcomes. Either you can’t get off the ground at all, which is demoralising and teaches your body nothing useful. Or you swing, kip, and strain through a half-rep using momentum instead of muscle — which places significant, unnecessary stress on your shoulders.
A structured how to do first pull-up at home routine solves both problems. By breaking the full movement into grip work, controlled lowering, and assisted reps, you build the specific strength required at each stage instead of attempting the whole thing before you’re ready.
Essential At-Home Gear Setup (No-Drill Setup)
You don’t need a home gym for this. Three items cover everything.
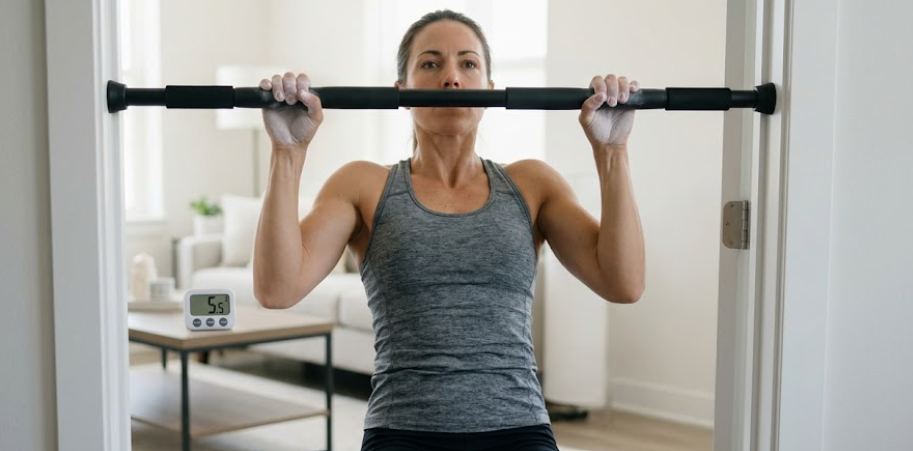
The foundation is a sturdy doorway pull-up bar. This is non-negotiable — every phase of this progression depends on having reliable access to a bar without needing a commercial gym.
🛒 Recommended gear: A heavy-duty doorway pull-up bar installs in your doorway in minutes with no drilling required, and multiple grip positions let you train wide, narrow, and neutral grips from one bar.
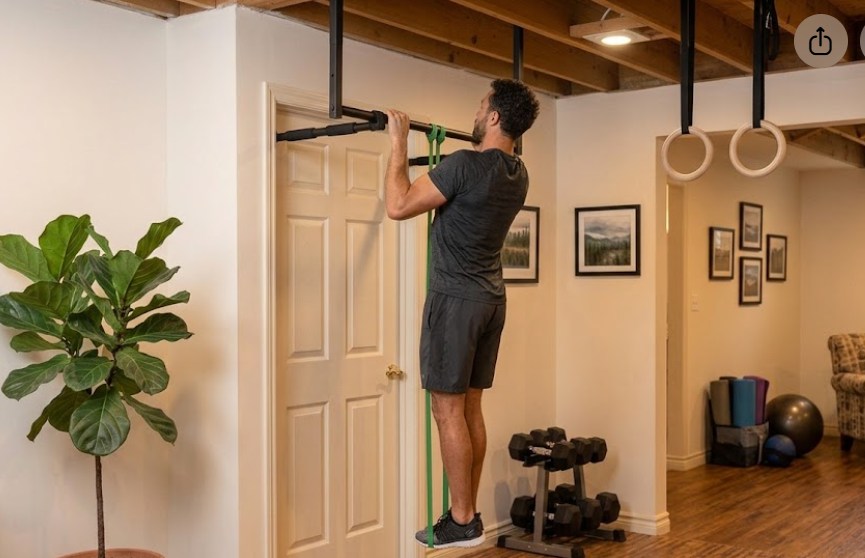
Assistance bands bridge the gap from zero reps to a full rep. These are the single most valuable tool in this entire progression — a thick loop band anchored over the bar takes a portion of your body weight off, letting you practise the complete range of motion with proper form long before you can do it unassisted.
🛒 Recommended gear: A set of heavy-duty pull-up assistance bands gives you multiple resistance levels, so you reduce assistance gradually as your strength builds over the four weeks.
Grip support prevents your hands from becoming the limiting factor. Dead hangs and negatives place serious demand on your grip, and slippery or callused hands will cut sets short before your back and shoulders are actually fatigued.
🛒 Grip option 1: A refillable gym chalk ball improves grip and reduces sweat-related slipping — the classic choice for serious grip training.
🛒 Grip option 2: Padded workout gloves with wrist support protect against calluses and add wrist stability — better suited if you’re prone to wrist discomfort during hangs.
For a full breakdown of what else belongs in a beginner’s setup, our minimalist home gym gear setup guide covers the complete essentials list

The 3 Pillar Exercises of Pull-Up Progression
Every effective pull-up programme is built on three foundational pillars, trained in sequence.
Phase 1 — Grip and Scapular Control. Before you can pull, you need to hang. Dead hangs build the raw grip endurance the entire movement depends on, while scapular retractions teach your shoulder blades to pull together and down — the exact motion that initiates a proper pull-up rather than a shrug.
Phase 2 — Eccentric Loading. This is where the real strength-building happens. Jumping to the top position and lowering yourself under control for 5 seconds trains your lats through their full range using far more muscle fibres than a partial, rushed attempt ever could.
Phase 3 — Accommodating Resistance. Band-assisted reps let you finally practise the complete movement — bottom to top — with a portion of your body weight supported. This teaches the full motor pattern your body needs before removing the assistance entirely.
The 4-Week Doorway Pull-up Progression for Beginners
Train 3 times per week with a rest day between sessions.
| Week | Focus | Exercises | Sets x Reps/Time |
|---|---|---|---|
| Week 1 | Foundation & Grip | Dead hangs, scapular pulls | 3 x 20-30s hangs, 3 x 8-10 scapular pulls |
| Week 2 | Eccentric Lowering | 5-second negatives, dead hang holds | 3 x 5 negatives, 3 x 30s hangs |
| Week 3 | Banded Full Reps | Heavy-band assisted pull-ups | 3 x 6-8 assisted reps |
| Week 4 | The First Strict Rep | Light-band taper + unassisted attempts | 3 x 4-6 light-band reps, then 1-2 unassisted attempts |
Progression rule: each week, aim to add either one more rep to a set or one extra second to your negative descent. Once you can complete 3 sets of 8 to 10 controlled 5-second negatives, you’re genuinely ready to test a strict, unassisted rep.
Most beginners land their first pull-up somewhere between 8 and 12 weeks of consistent training — this 4-week plan gives you the foundation, and continuing the same structure for another 4 to 8 weeks typically finishes the job.
3 Critical Doorway Pull-Up Mistakes to Avoid
Kipping and swinging instead of strict, controlled tension. Using momentum to yank yourself upward feels like progress but builds almost no actual strength and places significant strain on your shoulder joints. Every rep in this progression should be slow and controlled — no swinging.
Partial range of motion. Skipping the dead hang at the bottom or stopping short of chin-over-bar at the top trains a shortened, incomplete version of the movement. According to Healthline, proper pull-up form requires a full hang at the bottom and the chin clearing the bar at the top — anything less isn’t training the full range your back needs to develop.
Neglecting shoulder blade depression. Shrugging your shoulders up toward your ears during a hang or pull disengages your lats and shifts load onto smaller, less capable muscles. Focus on actively pulling your shoulder blades down and back throughout every rep — this single cue fixes more pull-up form issues than any other.
FAQ and Safety Considerations
Can doorway bars damage doorframes?
A quality no-drill bar distributes pressure evenly across the frame and won’t damage a solid, properly mounted doorway when used within its stated weight capacity. Avoid mounting on hollow or damaged frames, and never attach additional equipment like rings or TRX straps to a leverage-style doorway bar.
How often should I train pull-ups at home?
Three sessions per week with rest days between is ideal for beginners — your back and grip need genuine recovery time between sessions to adapt and get stronger. Once you’ve landed your first pull-up, you can increase to 3 to 4 sessions weekly.
Chin-ups vs. pull-ups: which is easier to achieve first?
Chin-ups — palms facing you — are generally easier for beginners because they recruit the biceps more heavily alongside the back, giving you extra pulling power. If you’re struggling with strict pull-ups, practising chin-ups first is a completely valid strategy before transitioning to the pull-up grip.
For a routine that builds the core stability this progression also depends on, check out our Core Strength Routine
Final Thoughts: Consistency Beats Force
Landing your first pull-up isn’t about one heroic attempt — it’s about showing up three times a week, adding a rep or a second here and there, and trusting the process laid out above. Every dead hang, every controlled negative, and every banded rep is building the specific strength your body needs. Respect the progression, stay consistent, and the day you finally clear that bar unassisted will feel every bit as good as it sounds. To build the upper-body strength needed to clear the bar, make sure you hit your daily protein requirements for beginners so your lats and arms recover between workouts.
Disclaimer & Affiliate Disclosure:
This article is for informational purposes only and should not be taken as medical advice. Always consult with a qualified healthcare provider or certified fitness professional before starting or changing your exercise routine. This article may also contain affiliate links. If you purchase through these links, we may earn a small commission at no extra cost to you.