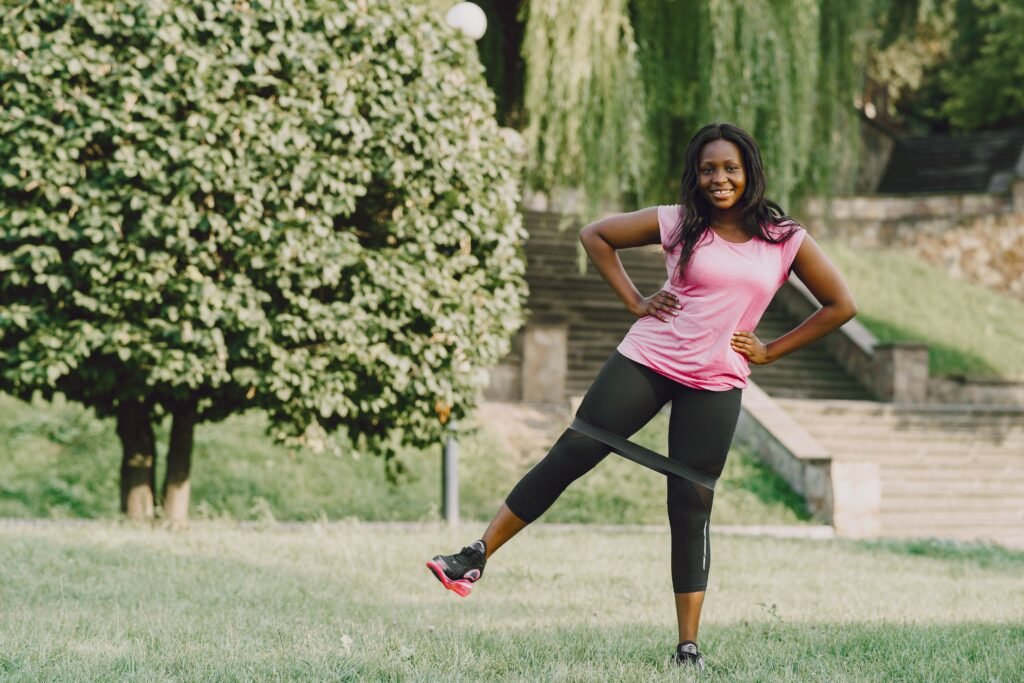
A glute workout with resistance band loops is one of the simplest ways to strengthen your glutes at home, and a session takes 20 to 30 minutes.
Table of Contents
Quick Summary
- The routine: five moves (glute bridge, banded squat, lateral band walk, donkey kick and clamshell) for 2-3 sets of 12-15 reps each.
- How often: two to three non-consecutive days a week.
- Which band: start with a light-to-medium fabric loop band and move up when the last reps feel easy.
- Does it work? A 2019 meta-analysis found elastic resistance builds strength about as well as conventional weights.
- Stay safe: check the band for nicks before every set and never let go while it is stretched.
Most glute guides give you a list of exercises and stop there. This one also covers which band to pick, how to set up a weekly plan, how to progress, and how to keep a stretched band from snapping back at you.
Why Resistance Bands Work for Glutes
Your glutes are three muscles. The gluteus maximus is the big one that extends your hip, and the gluteus medius and gluteus minimus sit on the side of your hip and keep your pelvis steady. A loop band around your thighs adds outward resistance, so every rep asks all three to work against tension.
Research backs the basic idea. A 2019 systematic review and meta-analysis of eight randomized trials (224 participants) found that training with elastic resistance produced similar strength gains to training with conventional equipment like machines and dumbbells, including for lower-body strength.
There are limits worth knowing. The trials were small, ran for roughly 4 to 12 weeks, and measured strength rather than muscle size or glute shape. So bands are a proven way to get stronger, but you still need to make the work harder over time, which we cover below.
What You Need for a Glute Workout at Home
You do not need a gym. Here is the gear that makes this routine work, and what each piece is for.
- Fabric hip circle band: the main tool. Fabric loops tend to stay in place above your knees better than thin latex loops, which can roll up as you move. Check the listing for the resistance levels it includes.
- Resistance band set: a set gives you several strengths in one purchase, so you can move up without buying again.
- Adjustable dumbbells: optional, but they are the easiest way to keep progressing once your bands feel light.
- A mat: for the floor moves. A folded towel works too.
New to bands? Our resistance bands for beginners guide explains the different types.
How to Choose Your Band Strength
Pick the band that lets you finish every rep with good form while the last two or three reps feel hard. If you cannot control the movement, the band is too strong. If you could do 25 reps easily, it is too light.
| Band level | What it feels like | Best for | Move up when |
|---|---|---|---|
| Light | Easy to control, mild tension | Clamshells, your first glute bridges | You finish all sets and the last reps feel easy |
| Medium | Clear tension at the top of each rep | Squats, lateral walks, donkey kicks | You can do every set at 15 reps with control |
| Heavy | Hard to keep your knees from caving in | Progression for all five moves | Add a dumbbell or slow your tempo instead |
If you have a latex allergy, check the product listing before you buy. Non-latex options exist.
Warm Up First (3 Minutes)
A quick warm-up wakes up your glutes so they do the work instead of your lower back. Do each of these once, with no band:
- 10 bodyweight squats
- 10 glute bridges
- 10 leg swings per leg, holding a wall for balance
Your Glute Workout With Resistance Band: 5 Moves
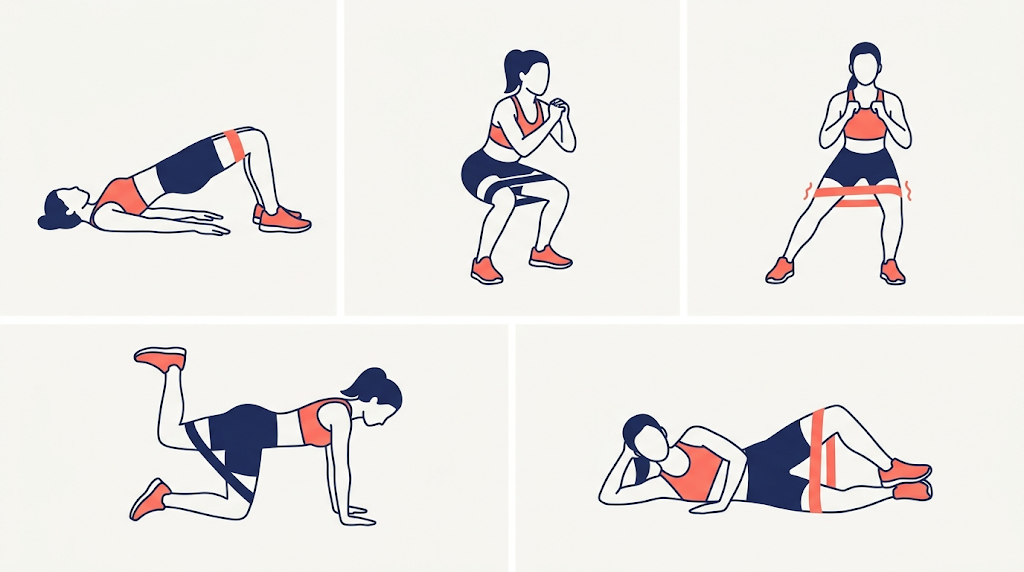
Do the moves in this order as a circuit, or finish all sets of one move before the next. Rest 45 to 60 seconds between sets. Aim for 2 sets of 12 to 15 reps in your first two weeks, then 3 sets.
1. Banded Glute Bridge
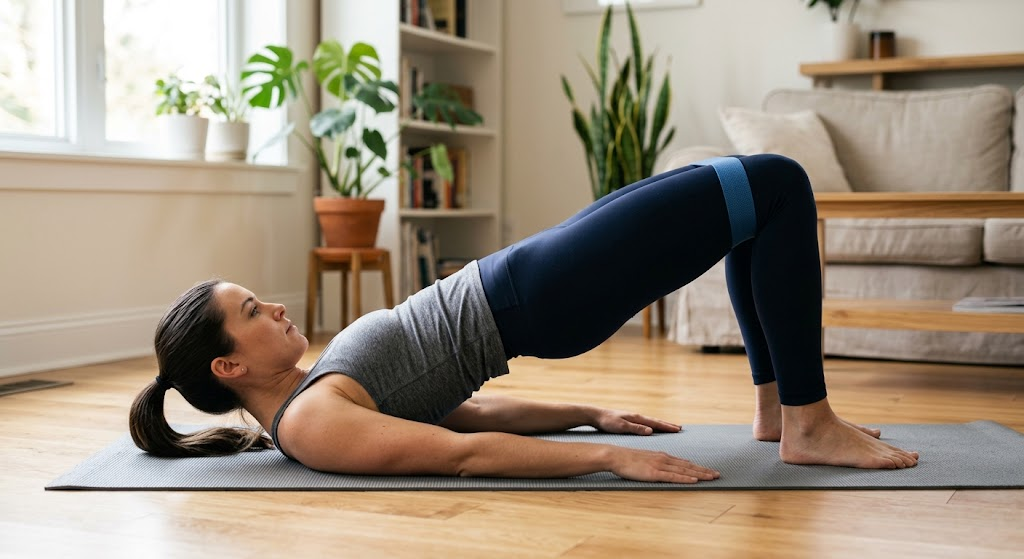
Lie on your back with your knees bent, feet hip-width apart, and the band just above your knees. Push your knees gently outward against the band, then drive through your heels to lift your hips.
Squeeze your glutes at the top for one to two seconds, then lower slowly. Common mistake: arching your lower back at the top. Stop when your shoulders, hips and knees form a straight line.
2. Banded Squat
Stand with your feet shoulder-width apart, toes turned out slightly, and the band above your knees. Sit your hips back and down as if lowering into a chair, pressing your knees out against the band.
Stand up by squeezing your glutes. Common mistake: letting your knees collapse inward. If your knees bother you, shorten the depth and stay in a range that feels comfortable.
3. Lateral Band Walk
Place the band above your knees and sink into a small quarter squat. Step sideways with one foot, then follow with the other, keeping tension on the band the whole time.
Take 10 to 12 steps in each direction. Common mistake: letting your feet come together between steps, which releases the tension. Keep your toes pointing forward and your chest up.
4. Banded Donkey Kick
Start on your hands and knees with the band above your knees. Keeping your knee bent at 90 degrees, press one foot toward the ceiling until your thigh lines up with your back.
Pause, then lower with control. Common mistake: swinging the leg higher by arching your lower back. Keep your ribs down and move only from the hip. Do 12 to 15 reps on each leg.
5. Banded Clamshell
Lie on your side with your knees bent at about 45 degrees, feet together and the band above your knees. Lift your top knee while keeping your feet touching.
Do not roll your hips backward to get more range. A smaller, slower movement works your side glutes better. Do 12 to 15 reps per side, then switch.
A Simple Weekly Plan
Do this routine two to three days a week, with a rest day between sessions. Your glutes need time to recover, and more days does not mean faster results.
| Weeks | Sets | Reps | Notes |
|---|---|---|---|
| 1-2 | 2 | 12-15 | Learn the movements with a light band |
| 3-4 | 3 | 12-15 | Add a third set when the first two feel controlled |
| 5+ | 3 | 12-15 | Use a heavier band or one of the progressions below |
Give it at least a month before you judge it. Most programs in the research ran 4 to 12 weeks.
How to Make It Harder
Change one thing at a time. When you finish every set at the top of the rep range with good form and the last two reps feel easy, pick one of these, from easiest to hardest:
- Slow the lowering phase. Take three seconds to lower on every rep.
- Pause at the top. Hold each bridge or kick for two seconds.
- Use a heavier band. Move up one level from the table above.
- Add a dumbbell. Rest one across your hips for bridges or hold one at your chest for squats. A pair of adjustable dumbbells lets you add weight in small steps.
To train the rest of your legs with the same equipment, add our leg workout with resistance band on a separate day.
Common Mistakes to Avoid
- Using a band that is too strong. If your knees cave in, drop to a lighter band.
- Rushing the reps. Slow, controlled reps do more than fast ones.
- Arching your lower back. Keep your ribs down and let your hips do the work.
- Skipping the warm-up. Three minutes makes your glutes fire earlier in the set.
- Doing it every day. Two to three sessions a week is enough to start.
Resistance Band Safety
A stretched band stores energy, so treat it like gym equipment. The band maker TheraBand’s care and safety guide gives these basics:
- Inspect before and after every use. Throw out any band that is torn, punctured or nicked.
- Never release a band under tension. Let it return slowly, and keep it away from your face.
- Secure any anchor. If you ever attach a band to a door or post, make sure it is firmly attached and keep an eye on it.
- Store it properly. Keep bands in a cool, dry place out of direct sunlight.
Stop if you feel sharp pain, as opposed to the normal burn of working muscles. If pain in your knees, hips or lower back keeps coming back, check with a healthcare provider or certified fitness professional before you continue.
Quick Answers
Can bands alone build stronger glutes? For strength, the research above says bands work about as well as weights, as long as you keep making the work harder. For bigger glutes over the long run, add a heavier band or dumbbells once the bands feel light.
How long does one session take? About 20 minutes with 2 sets per move, and closer to 30 with 3 sets, including the warm-up.
Is a glute workout with resistance band safe for beginners? Yes, when you start light, check the band for damage, and stay in a range that feels comfortable. If something hurts in a sharp way, stop.
Where do I put the band? Above your knees for all five moves. For lateral walks, sliding the band down to your ankles makes them harder, so try that only once the knee position feels easy.
The Bottom Line
A glute workout with resistance band loops works best when you keep it simple: five moves, a band that matches your level, and two to three sessions a week. Start light, control every rep, and make it a little harder every couple of weeks.
Do this for a month before you decide whether it is working. If you want to keep progressing, add a heavier band or a dumbbell, and build the rest of your lower body with the linked leg workout above.
Disclaimer & Affiliate Disclosure
This article is for informational purposes only and should not be taken as medical advice. Always consult with a qualified healthcare provider or certified fitness professional before starting or changing your diet or exercise routine. This article may also contain affiliate links. If you purchase through these links, we may earn a small commission at no extra cost to you.